Installation Guide for Custom Scales on your Benchmade Bugout
Note: According to Benchmade's warranty policy, "[The Benchmade Lifetime Warranty] does not cover...disassembly of any knife by any person other than Benchmade's Warranty department...."
Before you begin...
Review these instructions thoroughly.
Gather the tools and supplies you'll need:
- Your Benchmade Bugout knife
- Replacement handle scales
- T6 Torx driver
- T10 Torx driver
- Soft cloth (to cover the work surface)
Choose a flat, stable work surface. Cover it with a soft cloth to help prevent parts from "bouncing” or rolling away when they drop onto the surface.

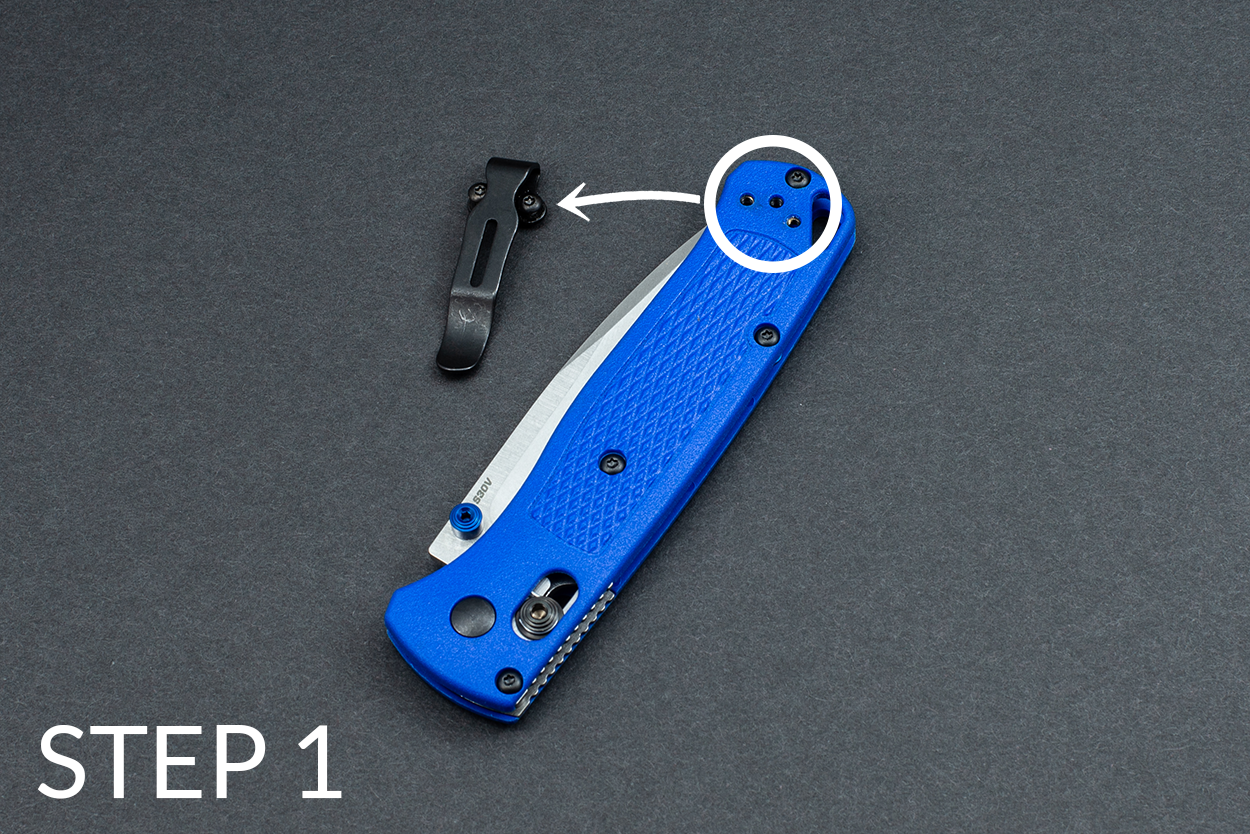
1. Begin with the knife closed. Using a T6 Torx driver, remove the two screws securing the pocket clip. Set these screws aside. You'll re-install the pocket clip in Step 15.
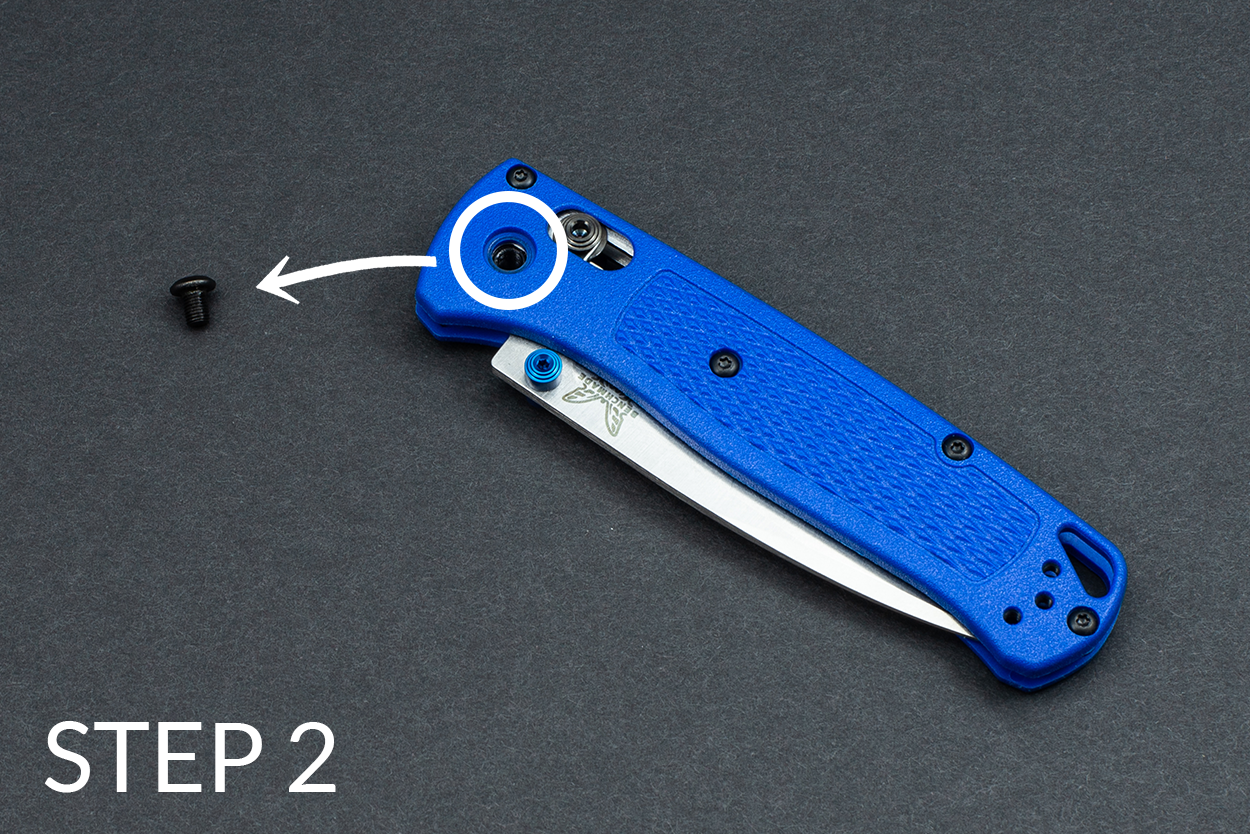
2. Using a T10 Torx driver, remove the male pivot screw. (This screw will be used again in Step 14.)
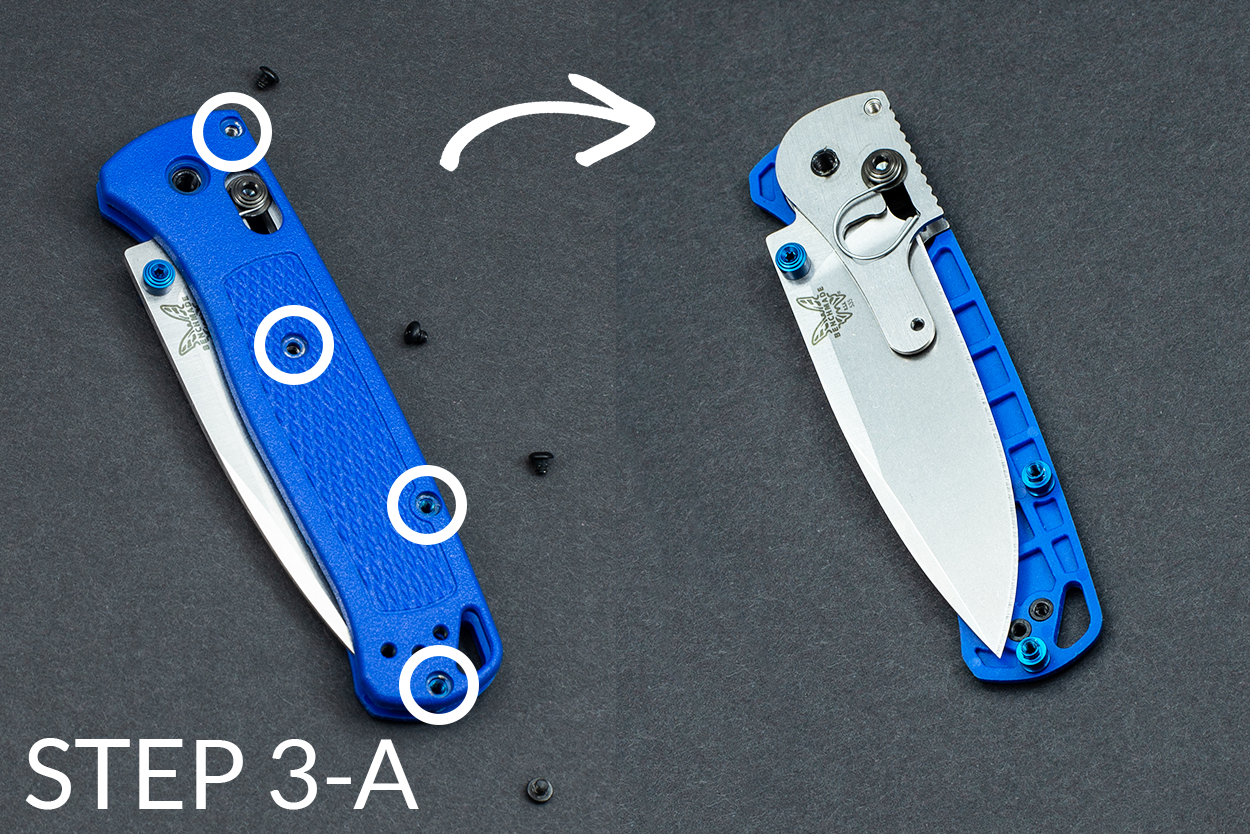
3A. Using a T6 Torx driver, remove the four screws securing the handle scales (the same side of the handle as the male pivot screw). Carefully remove the handle scale that's facing up and set it aside.
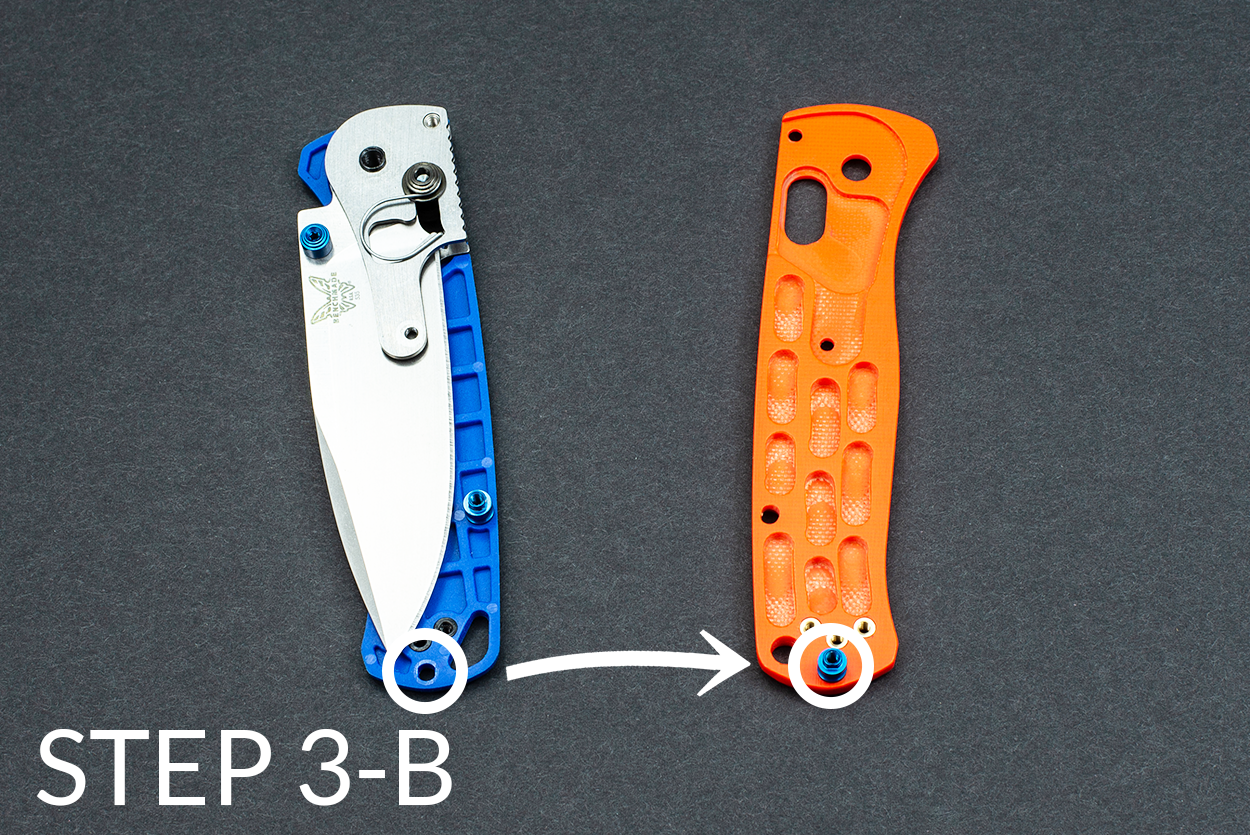
3B. Using a T6 Torx driver, remove only the bottom standoff from the original scale and fasten it into the new front scale.
4. Place the new scale in place. Using a T6 Torx driver, re-install the three remaining handle screws to secure the new handle scale. Do not tighten them all the way down yet.
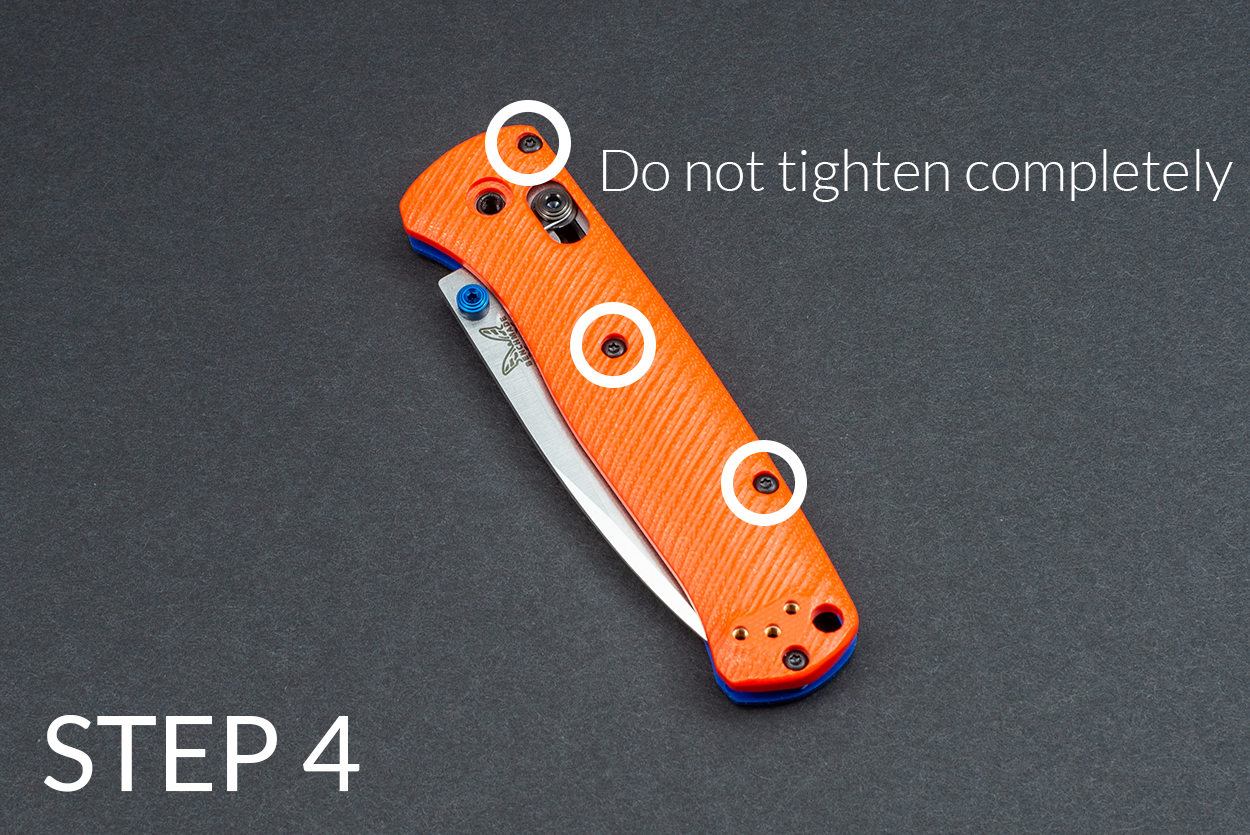
5. Turn the knife over so that the female pivot screw is facing up. Using a T6 Torx driver, remove the three remaining screws securing the handle scales. Set these screws aside. Don’t remove this handle scale just yet. (These screws will be used again in Step 10.)
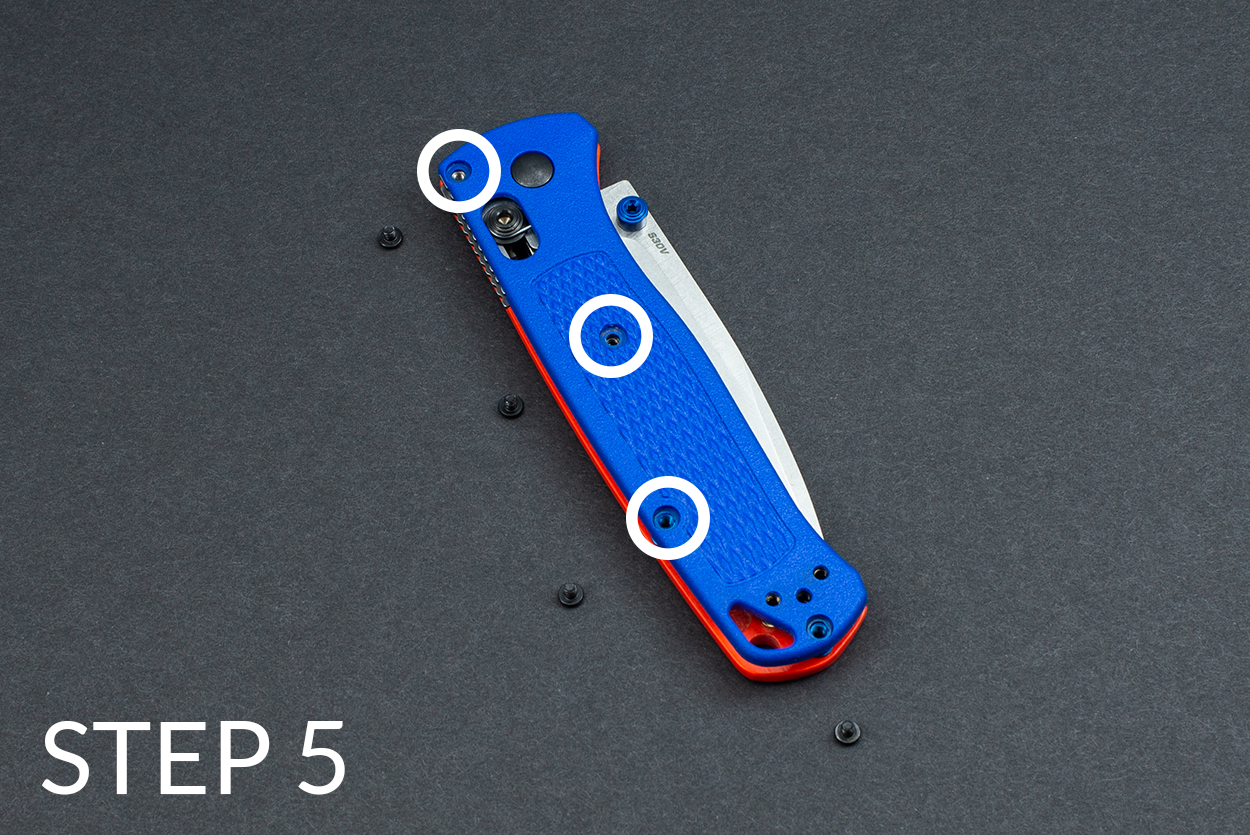
6. Turn the knife over so that your new scale on the front is facing toward you. Partially open the blade of the knife and hold the AXIS lock down in its lowest position -- don't allow the blade to open completely and don't allow the AXIS lock to engage. It's very important that the AXIS lock remain disengaged and the blade not move throughout Step 7 and Step 8.
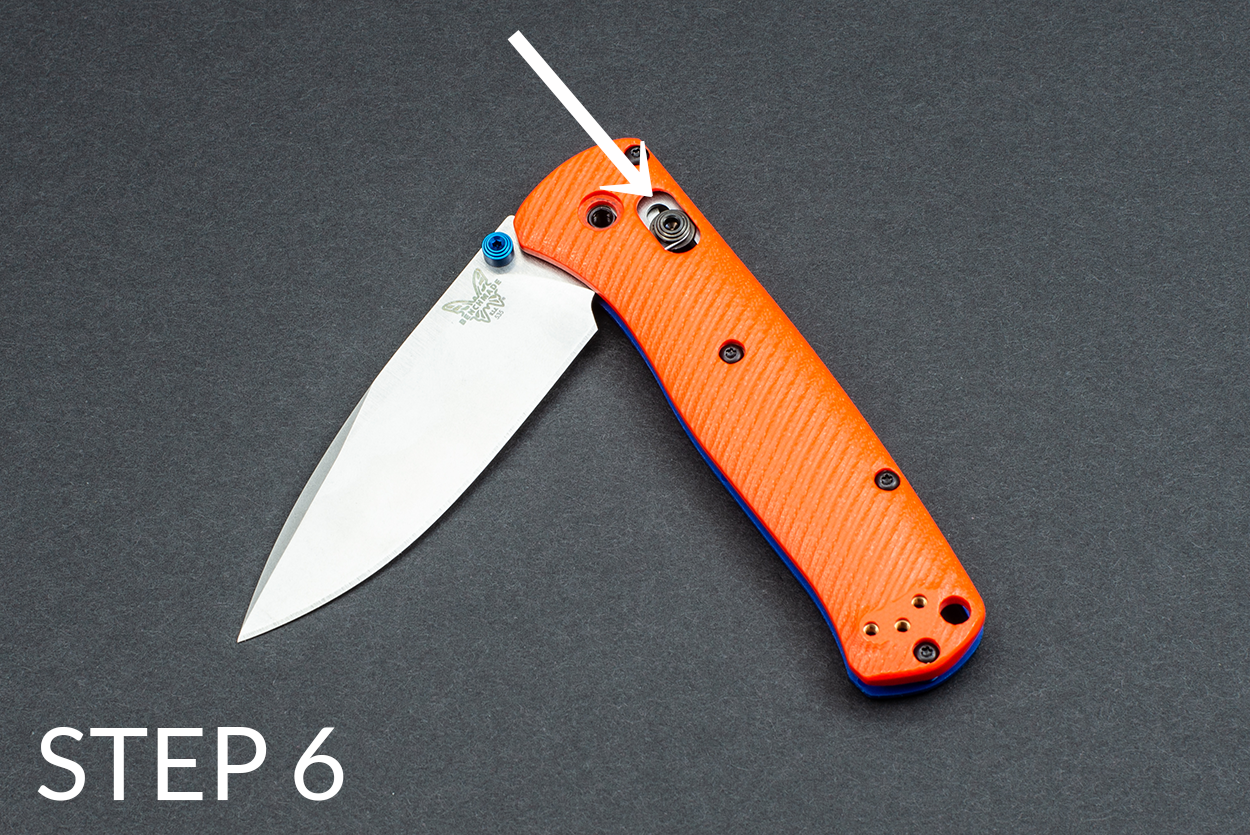
7. Insert a T6 Torx driver into the male (empty) side of the pivot and gently push the female pivot screw out of the other side. (The female pivot screw will be used again in Step 8.)
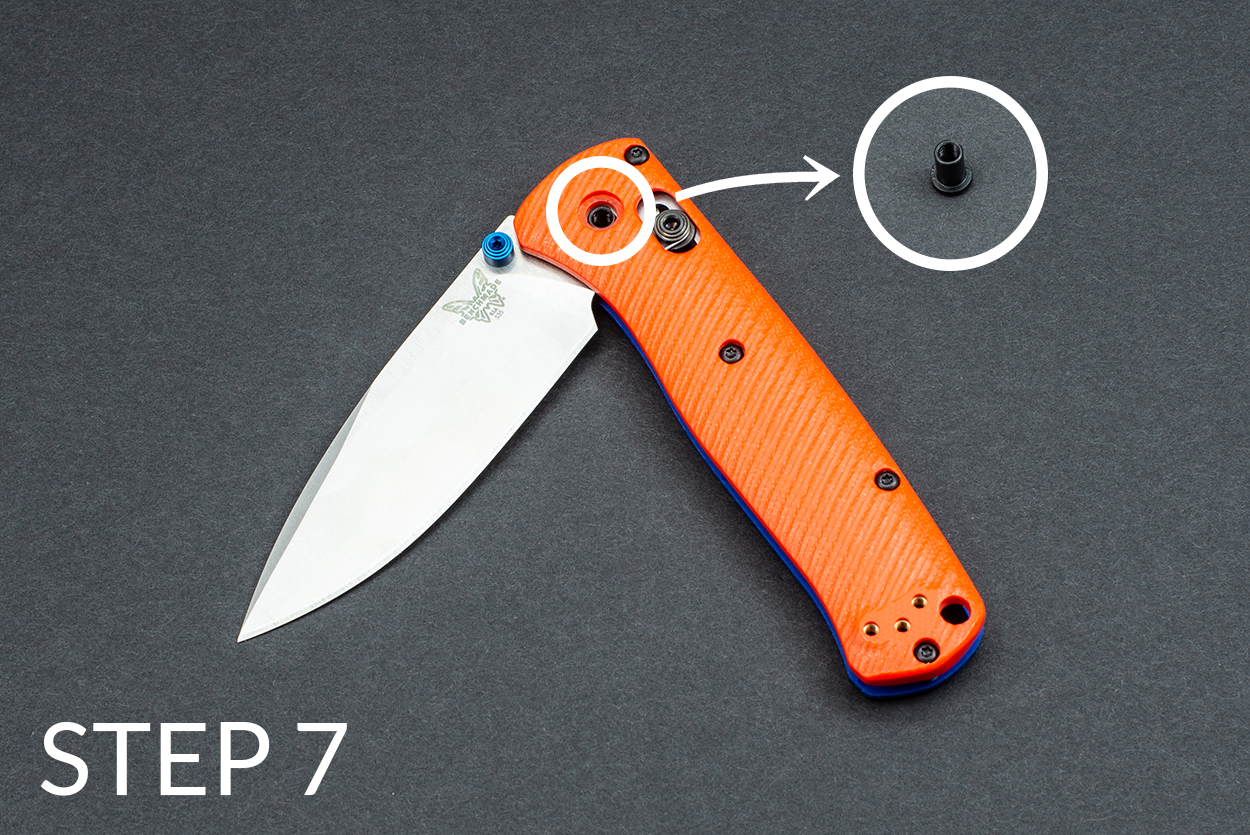
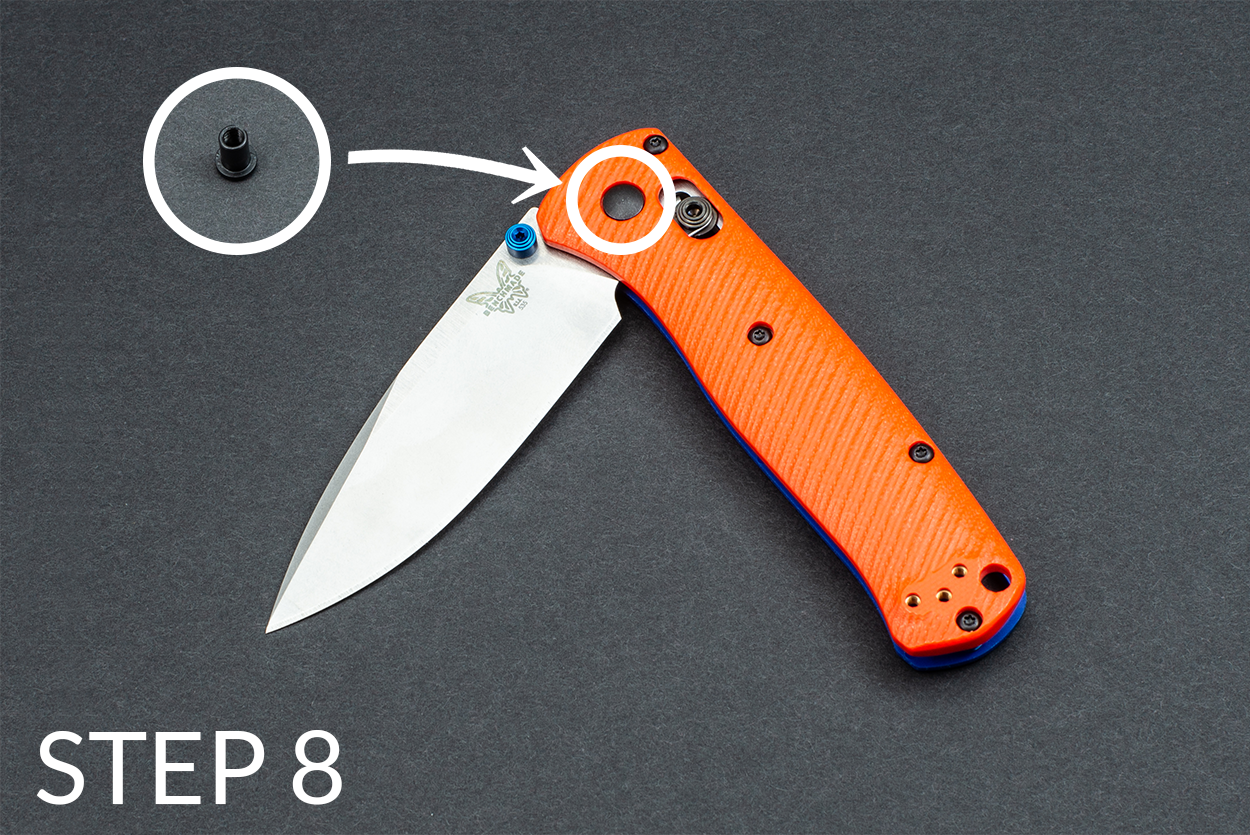
8. Temporarily insert the female pivot screw into the opposite side of the pivot. Be sure to align the flat side of the female pivot screw's barrel so that it inserts completely. Once the female pivot barrel is fully inserted, you may close the blade and let go of the AXIS lock for the next two steps.
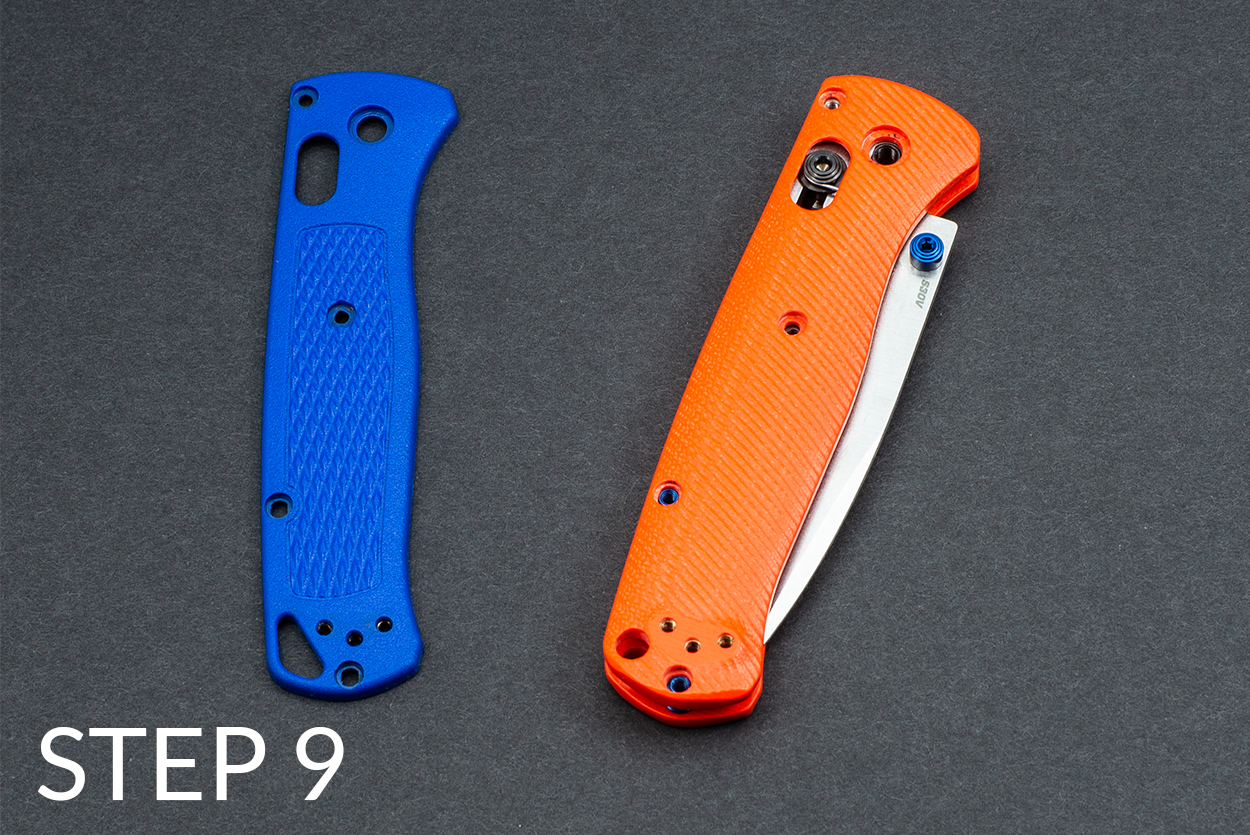
9. Turn the knife over so that the empty side of the pivot is facing up. Carefully remove the handle scale that's facing up and set it aside. Set the new handle scale firmly in place.
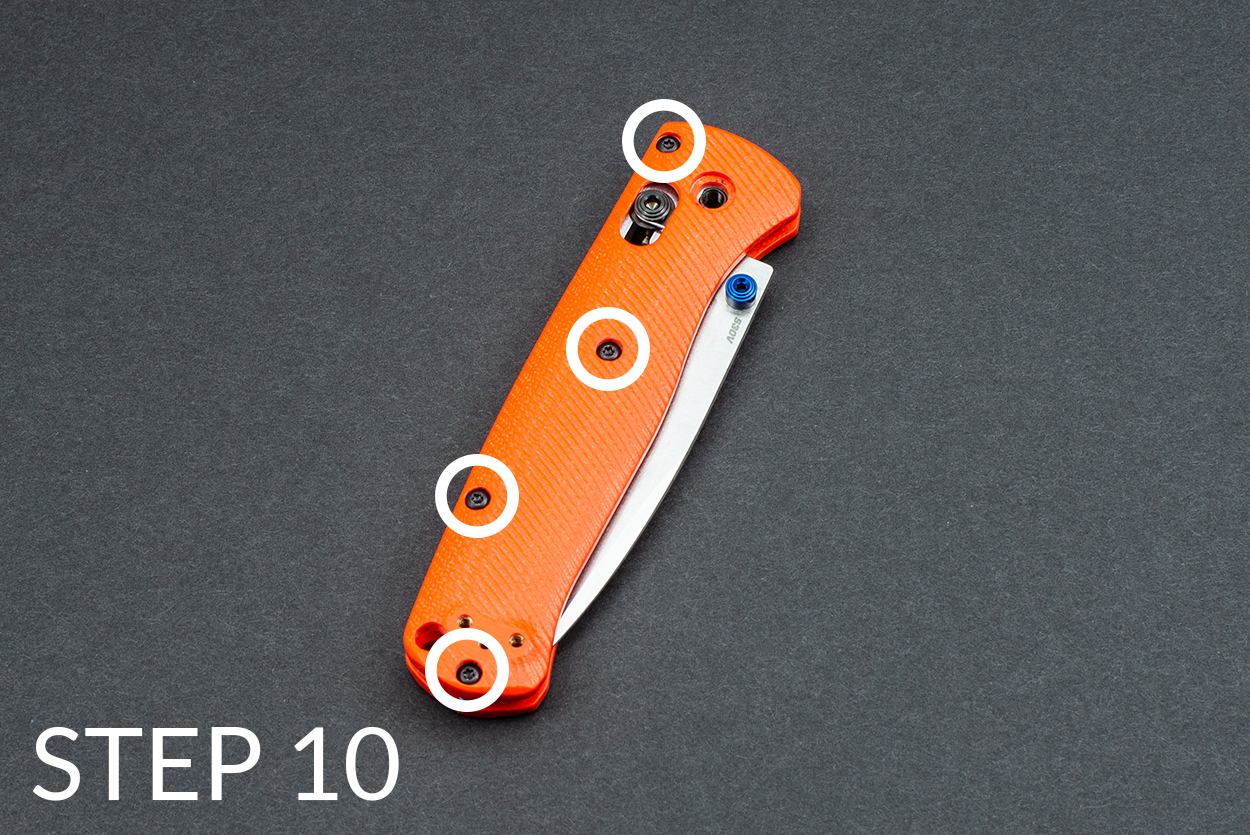
10. Using a T6 Torx driver, re-install the four original screws (set aside in Step 5) to secure the new handle scale. Don't over-tighten these screws.
11. Partially open the blade of the knife and hold the AXIS lock down in its lowest position -- don't allow the blade to open completely and don't allow the AXIS lock to engage. It's very important that the AXIS lock remain disengaged and the blade not move throughout Step 12 and Step 13.
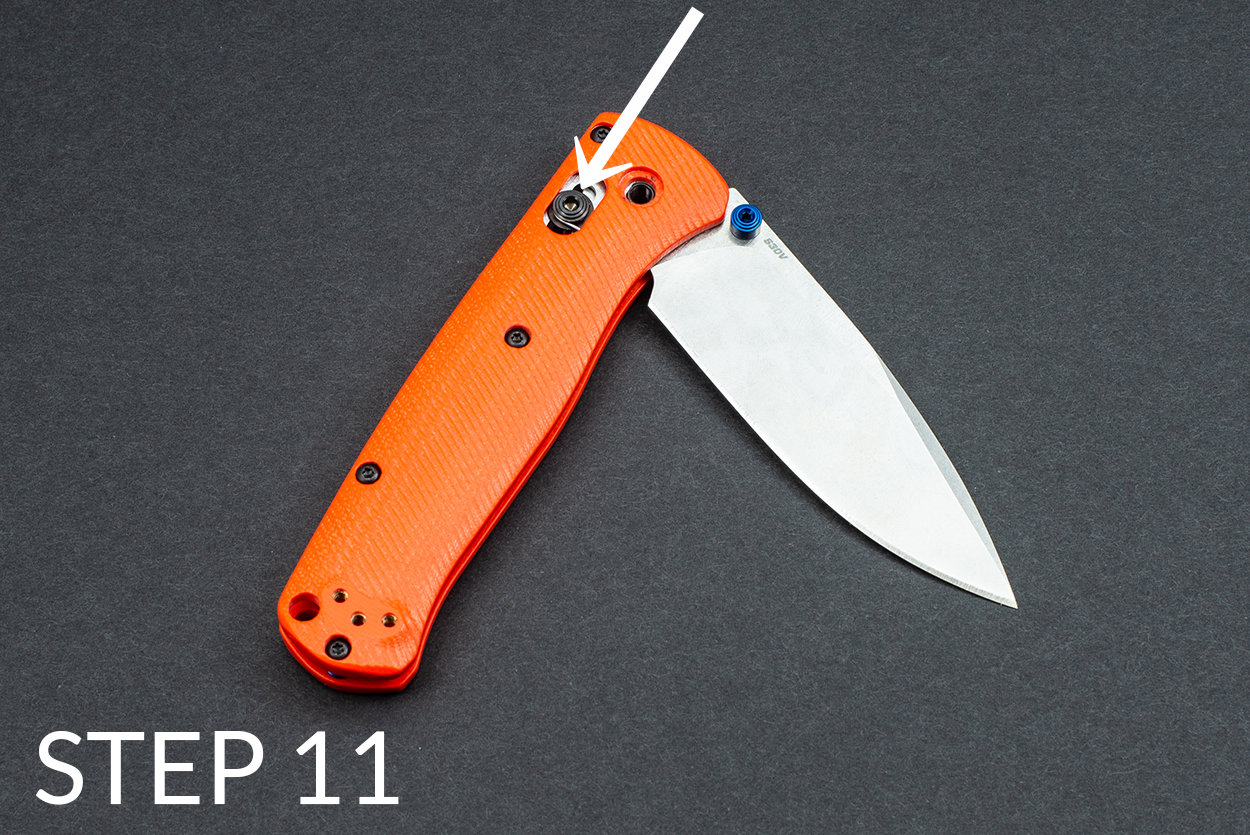
12. Insert a T6 Torx driver into the empty side of the pivot and gently push the female pivot screw (temporarily inserted in Step 8) out of the other side. (The female pivot screw will be used again in Step 13.)
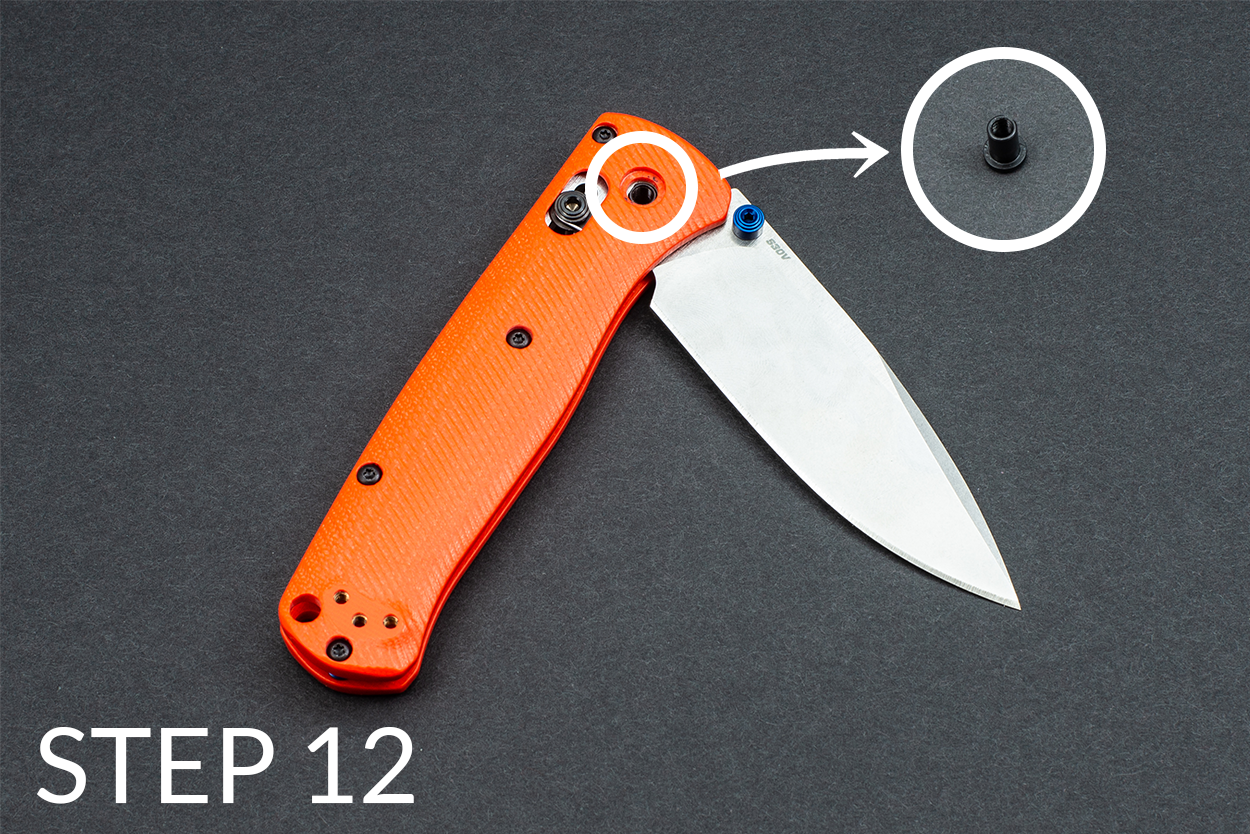
13. Re-install the female pivot screw in the opposite side of the pivot (its original location). Be sure to align the flat side of the female pivot screw's barrel so that it inserts completely. Once the female pivot barrel is fully inserted, you may close the blade and let go of the AXIS lock again.
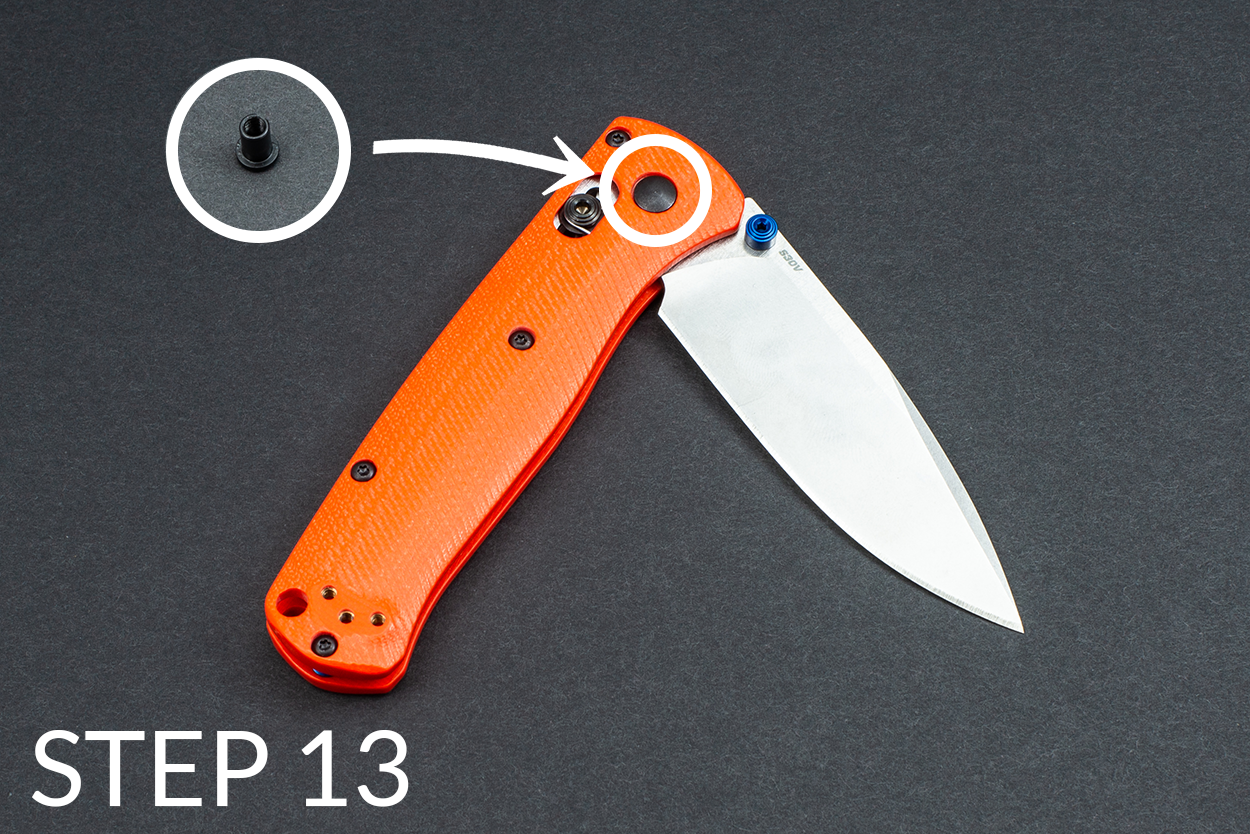
14. Using a T10 Torx driver, re-install the male pivot screw (removed in Step 2). Don't over-tighten this screw.

15. Using a T6 Torx driver and two original clip screws, re-install the pocket clip (removed in Step 1). Don't over-tighten these screws.
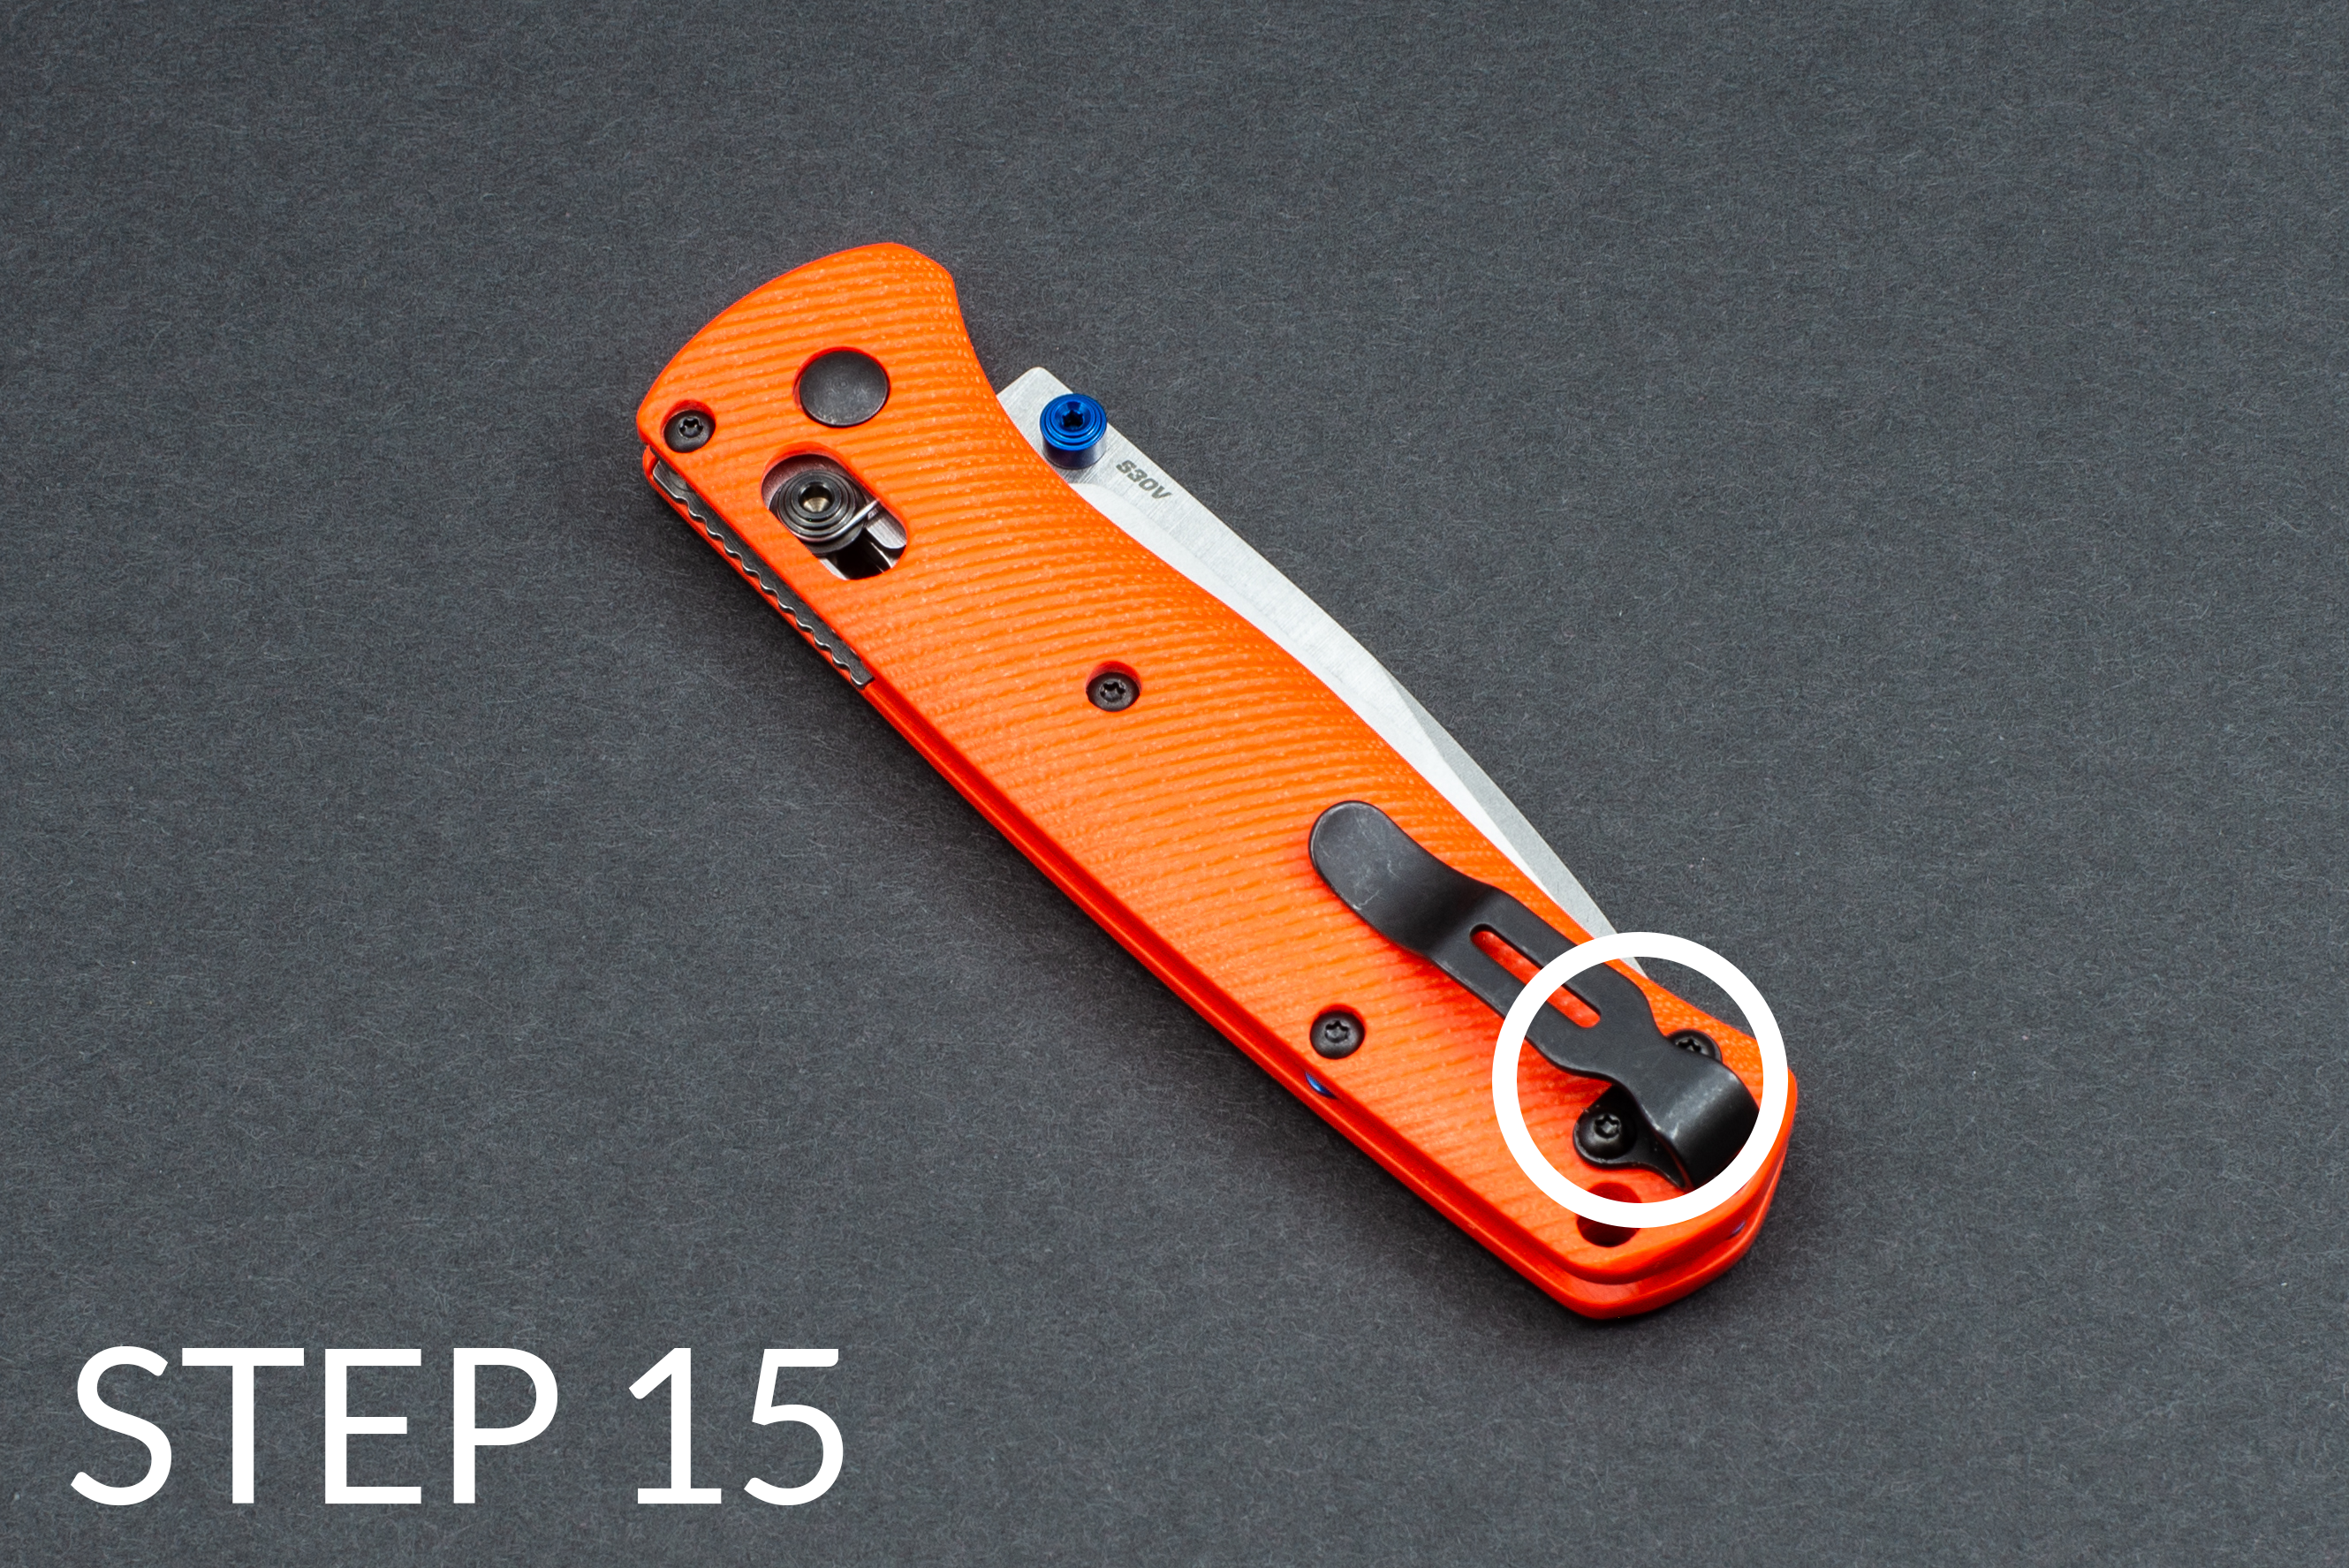
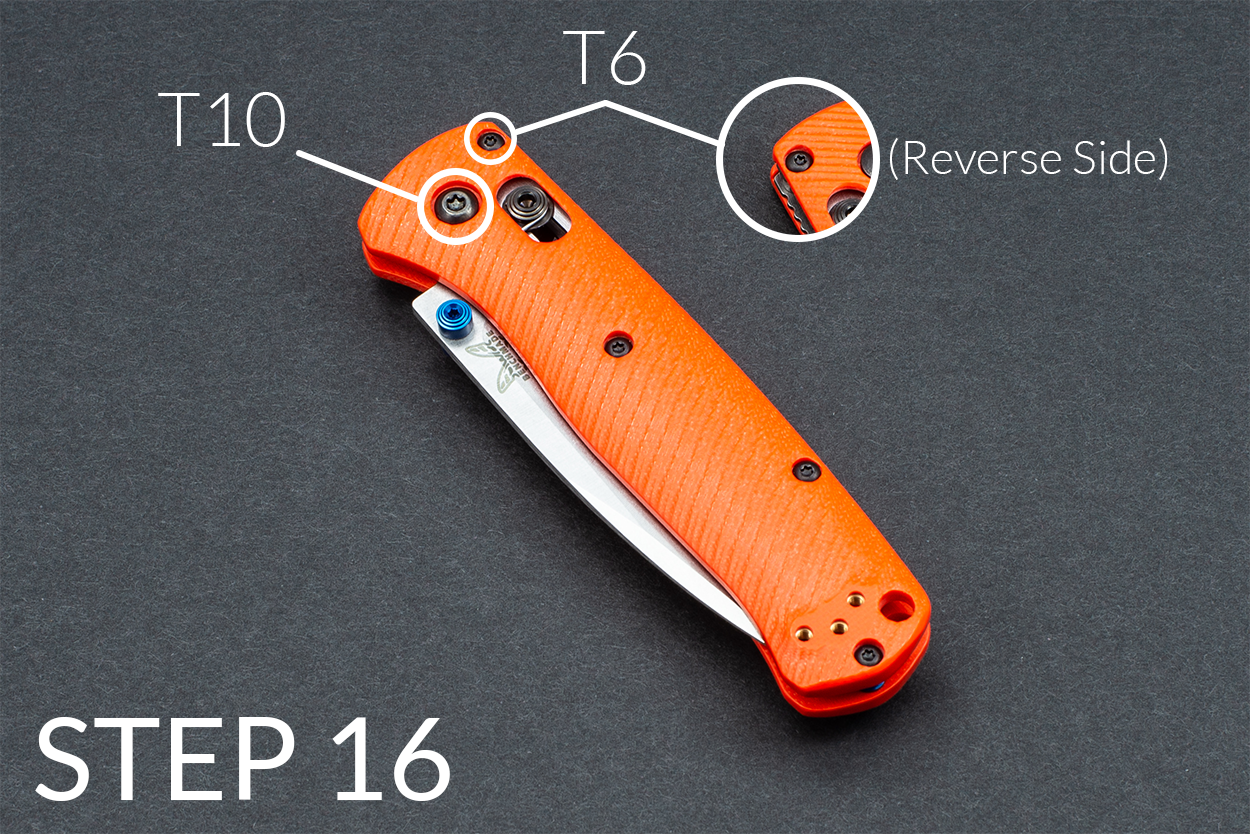
16. Using a T10 Torx driver for the pivot screw, and a T6 Torx driver for the two screws at the very top of the scales, adjust the screws so the knife functions safely and securely, according to your preference. Check your other handle screws and clip screws - ensure that all are tightened down appropriately.
Installation Complete!
